Growing Soil
10 min read
By Mark Garrett
Today’s blog is really a part 2 to the blog I posted on the 10 April 2013 – “Understanding Soil” – where I discussed what soil is and why it is so important for it to be healthy. As mentioned, for this to happen we have to encourage soil life (or biota) – by feeding them correctly – so that they break down the organic matter to create humus that will then feed the soil and the plants that grow in it. So it is all about encouraging life and growing soil, and I’m going to show you how.
As with everything else in permaculture, we can grow and maintain soil health sustainably with what we have readily accessible to us by designing systems properly so we don’t have to bring any inputs into our system. By doing this we are reducing our costs for food production or for general landscape care – including ornamental gardens. The stronger, healthier and more resilient your plants are, the more they will be able to fight off pests and disease, and the less you will have to intervene!
As Jackie French mentions in her book Soil Food, there are 3,764 different ways to feed your garden (Aird Books 1995). You’ll be pleased to know that I’m not going to go through them all here but she does provide a useful categorizing of the different methods in 5 different groups:
1. Buying or scavenging fertilizer (either artificial fertilizers, ‘organic’ fertilizers like manures, blood and bone, or mulching materials).
2. Recycling – garden and kitchen waste, urine, animal waste, paper – anything that will decompose.
3. Growing your own fertilizers – with deep-rooted perennials, green manure and ‘nitrogen fixing’ plants (i.e. rhizobia bacteria fix nitrogen in association with legumes and other root plants, while other free living bacteria like azobacter and clostridium pasteurianum also fix nitrogen from the air) or by growing algae.
4. Keeping small animals, whether sheep, chooks or earthworms, for their dung and the increased nitrogen fixing soil micro flora associated with it.
5. Making nutrients already in your soil more available to the plants.
Being a permaculturist, I am particularly interested in implementing design systems that will sustain themselves, in that they do not need any input from the outside (i.e. having to buy in special products and so forth).
Compost
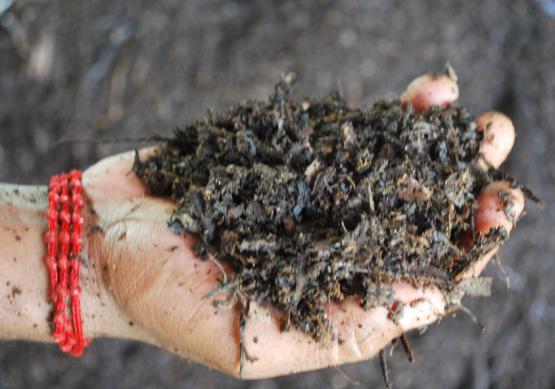
As mentioned in “Understanding Soil”, it can take nature up to 500 years to grow 1 inch of topsoil if conditions are not favourable. Luckily, you can do it much faster. The quickest way to grow soil I have found is using a composting method called “Hot Composting” or the “Berkeley Method”. It takes between 2 weeks and 18 days to create beautiful humus, and works by encouraging the breakdown of organic matter by creating the right food environment (i.e. the right carbon to nitrogen ratio) for its breakdown by the biota.
The recipe I use is as follows:
- Carbon to nitrogen ratio: 30:1;
- Water content of the pile needs to be 60% of the total pile mass (rule of thumb: squeeze a fist of compost and if a few drops of water run between your fingers you have the right water content)
- Oxygen – you can get this into your compost by turning it on a regular basis.
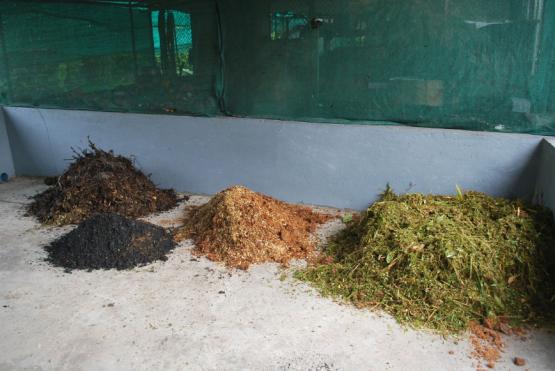
You can compost anything that has lived. As a rule of thumb, in case you are not sure what counts as carbon and what counts as nitrogen, carbon is brown and nitrogen is green. Once you have the right ratio of the brown and green in place then you add the water and oxygenate the whole pile by turning it on a regular basis.
The one thing to bear in mind is that the size of your pile and the materials you use, matters. Piles should measure at least 1 sqm. This size allows for the microbes to work more efficiently and to get the pile to heat up fast. Remember though that you need to make sure that the pile size is manageable to turn without using machinery.
Piles should be kept under cover, if possible, in order to avoid over-wetting the pile. Hot composting is aerobic composting, which means that we are relying on oxygen for the microbes to live and breakdown the organic matter. If the pile starts to smell you know it is too wet and that it may have become anaerobic which means that your little microbe soldiers have been killed off, leaving the organic matter to rot.
It is best to chip or shred the organic materials as this increases the surface area allowing for an ideal environment of oxygen and moisture for increased microbial activity, which makes for a quicker breakdown.

I have used this composting method in Bali, the Maldives and Australia and have even seen it done in Tasmania in a frosted field in the middle of winter, so you really can do it absolutely anywhere. You don’t need a warm environment, you only need the recipe above. It is the microorganisms that create the heat through their respiration in the right environment.
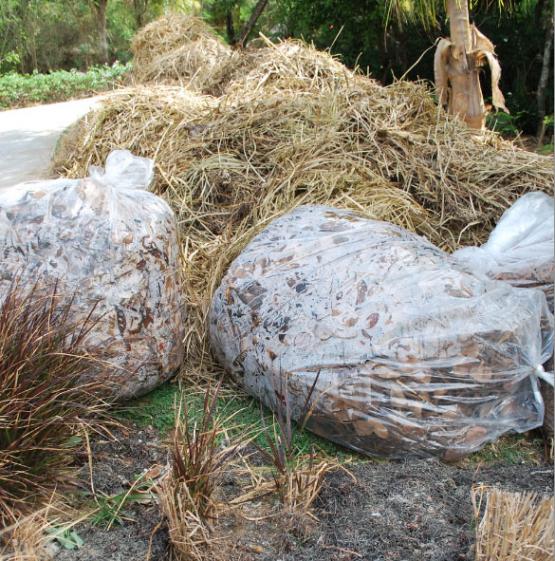
Mulching
As covered in Blog 2 mulching adds plant nutrients, minerals, regulates soil temperature, and promotes soil life and erosion control. What’s more, mulch turns to humus!
Mulch is usually considered to be organic matter covering your soil at a thickness of at least 15cm. But don’t be afraid of layering it on thick – as I like to say: ‘if you think you have enough on put more on! However, mulch does not necessarily have to an organic material, it can also include stone, rock, even plastic or other non-organics. Remember though that what is suitable really depends on what you are trying to achieve. Plastic sheeting, for instance, does not feed the soil although it can be used to retain moisture and prevent soil erosion plus limit weed competition with crops. So, although not the ideal gardening tool, plastic coverings can perform some of the useful functions of organic mulches but will not replace nutrient or allow humus to be made.
Mulch is another way to grow soil that is less labour intensive than composting though not as quick in making humus. The same principles apply for the best results in that you need a good carbon/nitrogen ratio, otherwise, if you are only putting carbon straight on your earth. This will draw the nitrogen up from the soil thereby depleting it, which is exactly the opposite of what you are trying to do.
And again, don’t forget to add water.
While out in the Caribbean, I worked on a villa built on bare, compacted, clay soil. The gardener watered twice a day, 6 days a week, and slowly but surely he had diligently eroded the soil of the entire garden! No soil life was evident.
The villa was located on a golf resort so all the grasses were kept very short and all cuttings were sent to the local waste dump where they were burnt. So we decided to put this to use. We used two golf buggies to collect the grass before it was taken to the dump and burnt. We added green fairway trimmings and seaweed that had washed ashore – perfect nitrogen supply. Six weeks later the clay was turning to soil, worms were reappearing in the ground and we had cut down watering 3 times a week, which turned out to be a saving of over $25,000! Good mulching practice can reduce your water consumption by 50%.

Living Fertilisers
The easiest way to secure healthy soil is to design your garden so that the ingredients you need for mulching, composting and fertilizing grow on your property directly. This is an important part of your design. This makes your project truly sustainable and since you are using what is on your land, you have designed a closed loop nutrient cycle so there is no waste!
You can use plant groupings to accelerate natural plant selection by creating diverse polycultures. This will also help with pest management since diverse planting will encourage different insects , birds and animals into your garden to feed on unwanted pests.
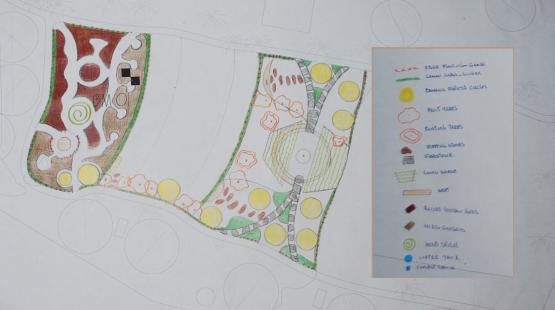
When designing a garden to grow biomass for composting and mulching it is best to do it on the edges of your garden. This then gets you several permaculture principles ticked off. Growing where you intend to use it, will save energy; we call this chop and drop. The more intensive the zone, the finer the biomass needs to be so it can break down quick to supply nutrient to annual crops. Good examples of fine, easy-to-break-down plants include lemongrass and comfrey. The further away, and therefore less intensive the zone, the rougher the mulch use can be. For example, using woody, high nitrogen yielding trees like acacias that also work well as a wind break, are great for use in a zone 3 as fruit tree mulch. Choosing the right mixture of mulching plants is very important as the right combo can also control frost, wind, weed penetration and sun damage to your gardens.
To implement a successful edge design (either on a new property or an established property that is being retrofitted) start thinking about what counts as an edge. You might have fence lines, pathways, roads, windbreaks or garden bed edges within your environment. Once you have identified these, and have identified what living mulches will work well for you in the environment (and zone!), plant them first. Once the edge is planted you will have a clearer idea of the garden area left to design within your edges. As discussed in my ‘Permaculture Design’ blog we are “working with nature not against it”, and once you start placing your garden beds you will start to see how nature takes control and guides you to the final solution especially since nature will, for example, show you the best way to face the beds according to sun direction, to collect rain, control water flow using naturally occuring contours and so forth.
Plants selected should be groupings (or ‘guilds’ as they are referred to in permaculture) of plants that will provide large amounts of biomass that can be harvested 2-3 times a year along with plants that are high in nitrogen and other elements. A tip: a successful guild of plants that I have used in the tropics is lemon grass, vetiver grass, arrowroot, pigeon pea and comfrey, plus various acacias. It’s best if grasses are of a seedless variety or cut before going to seed so you do not spread the seed to your garden beds.
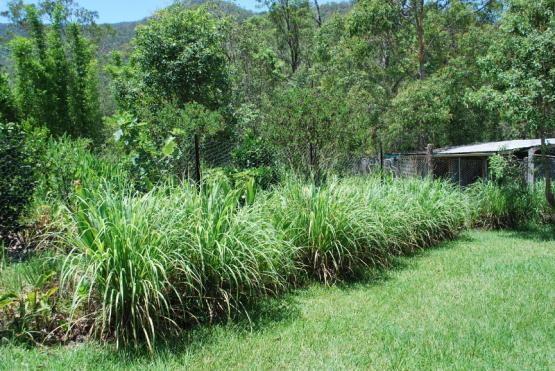
In Australia, I grew lemon grass on top of my septic drainage pits and harvested it 3 times a year for all my needs. Again thinking of more than 3 uses for this strategy: the lemon grass provided a nutrient sink from the septic, which was then chopped (and used as a mulch or in compost); as bedding in the chook house (and then transferred to the feet of the fruit trees); cooked with; dried and made into tea; used in the bath to scent the water or crushed to extract the essential oil which is a great insect repellent…
Planting pioneer trees will encourage predators into the garden as well; creating a wild life corridor that can also be used as mulching materials and soil builders. You will need to find what grows best in your climate and walking around your neighbourhood and observing what is growing already is a great idea.
Animal systems
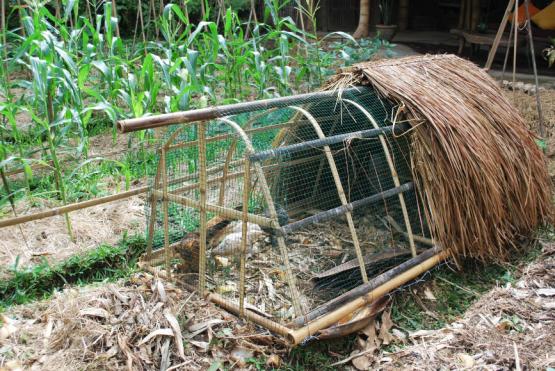
I am a big believer in incorporating animals in any sustainable garden design. In fact, I developed a whole 2-acre property with only 2 chicken ‘tractors’ (moveable chicken huts!) and 6 chooks over a 3-year period. They prepared all the planting holes for me as they fertilized, tilled, controlled pests and seeded in each area I placed the tractor. The girls grew me a fruit orchard that is now their free-range foraging system. They make all the compost for the trees as described above and, best of all, I have fresh eggs daily.
I have also used this system in the Maldives on sand when growing soil for an outdoor permaculture classroom, as well as in Bali on existing garden beds to improve soil.
Worm farms are another great animal system to consider, as they are your best soil friends. The more worms you have, the better. They will eat anything and give you 2 soil additives – vermicastings and worm juice liquid – which both contain beneficial microbes, which are amazing to add to your soil. They don’t need a lot of space or care, and there are various farms you can buy to house them and harvest their wonders, but an old bathtub filled with cow poo and left for a month, works wonders I assure you.
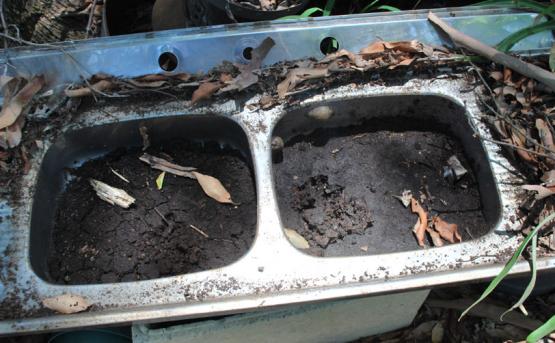
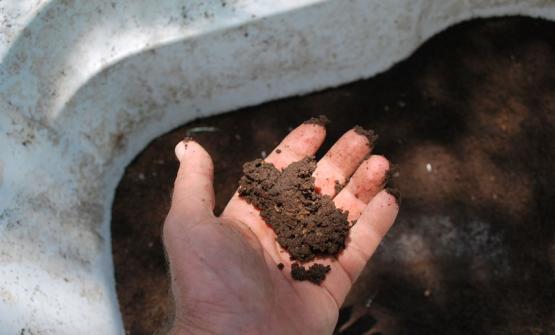
In Bali, we used the worm castings with compost and sand to raise our vegetable seedlings, and in Australia I left worms in a double bowel sink for years, without topping it up at all. The liquid microbe fertilizer they prepared was astounding – very similar to biodynamic preparation BD500 in fact.
The above – making compost, using mulches, growing beneficial plants and using chickens & worms – are just a selection of ways that you can use to sustainably improve the quality of your soil. There are many more, at least 3760 in fact. I may sound like a broken record, but I can’t emphasise enough how true it is that if you have healthy soil, the rest of growing is a cinch. Just as we need a varied diet so does your soil, so mix it up and see the benefits in your garden and so too your health.
If you have any questions, post your comments below and I will get back to you. Alternatively you can get hold of me on Twitter (@MGpermaculture) or by email.
- For the publishing schedule of Mark’s blog series, see “Our Virtual Expert“
- To read blog 1 in Mark’s series, see “What is Permaculture?“
- To read blog 2 in Mark’s series, see “Permaculture Design“
- To read blog 3 in Mark’s series, see “Understanding Soil“

